Tuesday, April 24, 2012

Tutorial: Paper Portfolio

For those of you that don't know, I have the best job ever. I work at the preschool at my church as a teacher's aide between two pre-k classes. The two teachers I work for are amazing - they're creative and kind and just really good at what they do, and I'm not saying that because I think they might read this. Well, not just because I think they might read this. Throughout the year, we save the kids' art projects, pictures and class work and when they graduate we present it to their parents in a cute little paper portfolio. As we're nearing the end of the school year, the time has come to start gathering papers and making the portfolios. Since I just started working on them, I thought I'd show you how easy and cute they are.

Here we go! You'll need:
 - 1 large sheet of posterboard
 - some adhesive velcro (a few inches should do you)
 - several inches of a few different kinds of ribbon
 - a single hole punch
 - a pen, pencil or marker (doesn't really matter which)

Step 1:

 Take your big piece of poster board and find a nice, flat surface to work on. This whole process takes about two minutes, so don't go out of your way to find a place to do this. There's no need for an epic quest or anything.

Fold your poster board over, leaving about three inches hanging out on one side. This is going to be your flap. Make sure that all of your edges line up nice and evenly.

Run a pen, pencil or marker over your fold to smooth it out and make it look pretty. Trust me, the difference between a nice looking portfolio and a folded poster board is a smooth edge.

Step 2:
Fold over the extra three inches you left on that one side. Again, make sure all of your edges line up evenly, and that you fold the whole flap over - all three inches.

Run your pen, pencil or marker along this new edge to smooth it out. Remember, this is not a piece of crap. Don't skip this step.

Here's what you should have so far.

Step 3:
Using your single hole punch, make three evenly spaced holes along the outer edges of your portfolio. Make sure that your first hole starts BELOW the flap when it's closed. 

Step 4:
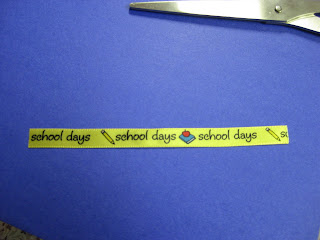
Gather up all of those ribbons! Remember, I'm making 21 of these bad boys - one for each of the students in my classes. I have seven different kinds of ribbon, but you probably only need three or four if you're only making one portfolio. 

Cut your ribbons into roughly 4 inch lengths. You'll need three or four ribbons per hole, and there are six holes total. You do the math. 

Tie three or four different bits of ribbon through each hole, double knotting as you go. Not only is this super cute, it keeps the edges of the portfolio closed so that you can put loose papers in it.

Step 5:
With your velcro stuck together, remove the paper covering the adhesive backing on the hook piece and stick it to the flap of your portfolio, in the middle about 1/2" in from the edge.

Remove the paper from the back of the loop piece and close the flap of the portfolio. When you open it up, both pieces will be exactly where they need to be to meet up perfectly!

Step 6:
Admire your handiwork and then stuff it full of papers, artwork and craft projects made by four year olds.

Wasn't that easy? Now I just have to finish 20 more. And for those of you playing along at home, that means I'll make 42 folds, punch 126 holes and tie 378 pieces of ribbon before I'm done. But you know what? I wouldn't trade this job with these kids for anything.

Monday, April 23, 2012

More Scherenscnitte

I promised to post a few more of my paper cuttings, so here they are. I'll tell you a little bit about each of them, and please forgive the quality of my photographs - some of them were done with a webcam, some with a camera phone and some with my little pocket Canon, all with complete disregard for things like 'lighting' and 'angle.' And they are all really, really old. Until this week, I hadn't cut anything in at least two years, so I was really searching through my old photographs to find these.

It goes without saying, but I have to say it anyway: Please, please, please do not copy my work. These are all original designs drawn by me, and I put a lot of myself into them; my time, my thoughts, my everything. I went through some really bad, hard times, and these paper cuttings were a form of therapy for me. Some of them I have never shared. If you can't draw, please feel free to browse the web elsewhere for free printable paper cutting templates provided by many craft sites and artists. Mine are not for personal use, not for sale, and especially not for you to sell. If you're interested in one of my pieces, please contact me and I would be happy to make a reproduction cutting for you or design an original work with you for a small fee. Thank you so much.

I wanted to share the template I drew for this cutting because not only is the picture mirrored, it's canted backwards and of really poor quality.  Here, you can see the ship sailing on the waves, about to be crushed by the tentacles of the sea monster. There's a hand reaching out in love to another, a girl trying to touch the stars, a spider spinning a web and capturing a heart, music, a growing vine and the word 'incessant' rising up and out of the girl's mouth. This piece took me several hours to draw, but I had a picture in my head of exactly what it would look like when it was done, and I'm really pleased with it. I have only cut this piece once, and it is hanging on my wall at home. When people ask how I felt during the bad times, I show them this.
 And here's the really bad webcam photo of the finished cutting. One of the things I love about scherenschnitte is the use of negative space to tell a story. Of all the pieces I've done, this one is probably my favorite.

 I cut this piece out of one sheet of paper quartered. It's a one-off - I drew it directly onto the paper and then cut it without making a copy. There will never be another just like this one. I drew and cut this for a friend who was visiting another friend in Germany. I also took her to Paris, which was an awesome trip that I'll tell you about some other time. She was really into skulls and Dia de los Muertos and piercings and tattoos - we got along quite nicely.

Now, I may just be patting myself on the back here, but I thought this was quite clever. What you're looking at here is one piece of paper, total. I used the negative paper that I cut away to create a second piece. If you put the pink Cinderella on top of the blue Cinderella, you'd have one solid piece of black paper. Cool, right? I thought so. I used Perrault's version of Cinderella for this cutting - though you might know it as the version Disney used. The pumpkin, mice, brooms, magic wands, key and glass slippers all come from the story. Notice that, due to a quirk in the way I cut the piece, blue Cinderella is wearing two glass slippers, while pink Cinderella has one slipper and one bare foot.
These pieces were designed and cut for J's little girlfriend back in Germany. He was in L-O-V-E love and had to give her something special, so this is what we did. I really like giving home made gifts whenever I can. It makes me feel like a super-mom.
I cut the Little Mermaid in the same way that I cut Cinderella - if you put them together, you'd have one piece of black paper. It's hard to see in these pictures, but pink Little Mermaid has scales cut into her tail at the hip and...knee, I guess? They show up better on blue Little Mermaid. Also, I hand painted the watercolor backgrounds for all four of these pieces myself. I really love working with watercolors, but the only thing I can do with them is create pretty color washes - all of my attempts at actual images have been huge flops. Oh well, you can't be good at everything, right?


This Air Force piece was made for my friend Beth's husband, Bill. He kind of got shafted when he left his unit in Germany, and I felt like he should have something special to remember his time in the service. I painted the blue paper and cut the Air Force symbol out of the top, backing it with metallic silver paper. I also cut a window out of the middle and backed it with the Airman's Creed. I added the AF seal and silver lettering last and framed the whole thing up. I don't know if it actually counts as a paper cutting, but I made it and I like it, so it gets to be on my blog. If you don't like it, get your own blog. It's free.
 And this is the piece I made for Beth - one of the Tree of Life cuttings I love to give to my dear friends. I decided to do it in reverse - it's opposite of my usual cuttings from this template, and I really like it this way. Again, the green is a watercolor wash and the frame is one that I found at the BX, fell in love with and bought like, ten of on impulse.


I know these pieces are really hard to see, but they are among my favorites. I made these for my mom's guest room a few years ago, and while that room has since been repurposed,  I'm hoping that they get to be hung on the wall again some day.

If you can't tell, these are hand drawn silhouettes from Where the Wild Things Are by Maurice Sendak. My mom has three daughters and nine nieces and nephews. When each child was small, my mom
gave each a copy of Where the Wild Things Are and read it to them. It is a tradition that she carried on to her grandchildren - both of my kids have a copy and a memory of their Mimi reading a very special story to them.

So when I wanted to make a special piece for my mom, it just had to be Max. See Max in his wolf costume chasing his dog with a fork?  And roaring his terrible roar and gnashing his terrible teeth after he's crowned king of the Wild Things?

And finally, there's Max swinging from the trees during the wild rumpus. You can't really tell, but the background paper is this really pretty shimmery green and the Max silhouettes are black. I had so much fun drawing these templates - picking out my favorite Max poses and trying to tell the story with pictures.

I've got big plans to do another series like this from other children's books that I loved. Maybe I'll get around to that some day. Psh, yeah right. My crafting to-do list is about a thousand miles long, it'll take me years to get around to that.

Anyway, there you have it. These aren't all the pieces I've ever done, but I have a terrible habit of giving away my creations without taking pictures or documenting them in any way. I should really work on that. I'm hoping that's what this blog will do - keep a record of my projects and ideas so that I can share them with others and teach them the things I've taught myself. What is the point of spending all of my time and energy working these projects out if I'm the only one who ever benefits from it?

Sunday, April 22, 2012

Tutorial: Ribbon Wreath

Last night found me down in an above-ground swimming pool shoveling sand. Dad would dump a wheelbarrow of sand down into the pit, and I would smooth it out with a rake and shovel, covering the  old sand that has been under this pool for the last several years and making a soft new layer for the replacement pool liner to sit on. So I'm down in this five-foot hole when my phone rings. Of course, my phone is on the deck several yards from the edge of the pool - totally unreachable. On top of that, I took the ladder out of the hole so that I could smooth the sand under it, and now I'm trapped. In a pit of sand. With no way out. And my phone is ringing.
Crap.

Needless to say, I didn't reach the phone in time. When I returned the call, it was to my friend Kathryn, who had a crafting query. She found this wreath on Pinterest and HAD to make one of her own RIGHT NOW. The problem was that she's never made a wreath before and wasn't sure how to make hers look like the one in the picture, which, of course, did not have any instructions. I love that people turn to me when it comes to craft questions and opinions and how-tos. It really just makes me feel all warm and fuzzy inside. So she describes this wreath to me over the phone - it's a round wreath with loops of ribbon intertwined all over it. I think I have a pretty good picture in my head and talk her through how I would put it together. While we're on the phone, I'm still shoveling and smoothing sand. Because I'm awesome like that.

To make a long story shorter, I wound up meeting her a little later at the Orange Store to buy supplies, me still in my work clothes, covered in sand and sweat and with pronounced hat hair. Good thing Kathryn loves me anyway. We bought way more ribbon than we wound up needing, a glue gun with about a thousand glue sticks and a wreath form. Please disregard the gross overpurchase of products in the picture below - at this point, I still hadn't seen a picture of this wreath we were trying to replicate and my personal policy is 'better safe than sorry and having to make another trip to the craft store.'

So here we go:

 You will need a 10" plastifoam wreath form (or whatever size you want, just adjust your ribbon amounts accordingly), a hot glue gun with sticks, a few flathead pins, two rolls of 2" ribbon for the base and about 12 rolls of thinner ribbon (about 15' each) in various colors and patterns for the loops. Note: We didn't use all of each roll of ribbon. Kathryn estimates that 24 rolls of ribbon would yield about three 10" wreaths, but we haven't tested that theory.
 First, we need to wrap our plastifoam wreath, because hot glue will just melt that foam away if we apply it directly. A layer of ribbon will protect the form and give us something that we can glue onto.  I know this picture shows the ribbon being pinned parallel to the sides of the wreath, but we wound up unwinding the ribbon and canting the end to make it wrap better. What I'm saying is, pin your ribbon diagonally to the form so that it doesn't wrinkle up when you wrap it around the circular form. And if you mess up (like we did) just unwind, unpin and start over. No big deal.
 It took us two rolls of ribbon, about 8 yards total, to wrap this wreath. In hindsight, we could have wrapped it a bit looser and used less ribbon, but I still don't think you could do this with less than 6 yards. Feel free to prove me wrong. When your first roll of ribbon runs out, just pin the ends and start the new roll where you left off.
 We found that 5" lengths of ribbon made for the perfect size loops on a 10" wreath. So go ahead and cut about a bajillion of them, pile them up and admire how nicely all the colors go together. You are amazing.
The best way to make sure that your wreath looks nice and full is to rim it inside and out with loops of ribbon before you fill in the front. With our wreath turned face-side down, we pinned a ribbon on either edge and adjusted them until we found exactly the right spot. Once we were happy with the placement, we hot glued them down. Notice that we crossed the ends of the ribbons instead of making perfect loops for this part.
This is the view from the front. See how we're making edges?
 Go ahead and continue that all the way around the inside of your wreath, being sure to keep them even and random. You don't want to clump all of the same ribbon together in one spot.
 Isn't that pretty?
 Now do the same thing to the outside edge, again, keeping them even with that first ribbon.
 At this point, it was very late and I needed to get home, so we decided to skip ahead. Once you have your edges beribboned, start randomly gluing circular loops of ribbon, like the ones in the picture, to your wreath front. I would recommend picking one ribbon, like this blue polka dot ribbon, and gluing about 20 loops randomly over the front of your wreath, making sure to get close to the edges you made. Then, pick another ribbon, and randomly glue 20 of those loops on. Then another and another until you run out of ribbon. That ensures full coverage and a good random sprinkling of colors and designs. Then, if 20 of each of your ribbons wasn't enough, do five more of each, until your wreath is full.
 Another detail Kathryn wanted to include in her wreath was interwoven ribbons. So as we went, we looped some ribbons in and around and through each other to create this effect.
 Isn't it coming along nicely? This is as far as we got before I abandoned Kathryn to her own crafting devices and took J home so he could go to bed. She vowed to have it finished by the time she went to bed, and you know what? I believed she could do it.
So this morning, she shows up at church with this. I love it! I want one of my own! I can't wait to make one for my house in bright, summery colors. It's going to be awesome - I'll post pictures whenever I actually get around to it, I promise. In the meantime, make your own and send me a picture - I'd love to see what you can do!

A note about hot glue guns: I don't own one. I never have. I just don't really do many crafts that call for a hot glue gun, I guess. So when we were at the Orange Store looking at their expanse of glue gunnery, I just picked a mid-range model with a stand and a precision nozzle. I recalled glue guns as being very messy and winding up with great globs of glue where you only wanted a small dot, so this 'precision nozzle' seemed like a good thing. And it WAS. The only problem, and I think this is a design flaw inherent in all glue guns, is that one small squeeze of the trigger yielded three drops of glue. Each ribbon requires two drops of glue: one to attach the first end to the wreath and another to attach the second end to the first. Three drops is just impractical. We probably wasted a good stick or two of glue on this project in random drips and drops. Luckily, hot glue sticks aren't that expensive, or this would be a real problem, but I challenge someone out there to design a glue gun that doesn't extrude molten glue at the drop of a hat. If you could make a dripless glue gun, you'd be set for life.

Saturday, April 21, 2012

Jennifer's Tree of LIfe Scherenschnitte

My mom has taught me many things in life. Too many things to list here. But as a military wife, my mom is one of the most adaptable people I know, and she does it not by simply acclimating to her surroundings, but by assimilating into them. Every time we moved, she learned about the place we were living and strove to make us a part of our new home rather than strangers just living there. She learned about local foods and made them for us, took us to festivals and cultural events and really made every place we were ever stationed another hometown for us.

So it happened that, being a military wife, I found myself living in Germany, twenty minutes from the French border. I learned about the food, about the culture and the history, I learned the language - well, I already knew the language, but I learned the dialect - and I was just missing something. As a crafty person, I needed something to take away from my time in the DE. And that's why I taught myself the art of Scherenschnitte.

Scherenschnitte is the art of cutting paper, and has very strong roots in Germanic history. Actually, many cultures have a paper cutting history - the Chinese and the Mexicans spring to mind. Beautiful scherenschnitte pieces can be found in museums and small shops in Germany, and that's where I was introduced to this amazing art. I remember finding a piece that was a farmhouse, several stories tall, with views into each of the floors and animals and an apple tree in the yard. It was so detailed and amazing, I just knew that I had to learn how to make these fragile, delicate lace-like pieces of paper.

Patterns for paper cutting abound online. You can print off a pattern for almost anything you can think of. But there's no challenge in that - it's like filling in a coloring book and calling it an original work. No sir. Not for me. So I began drawing out scherenschnitte patterns of my own - pieces that spoke to me and about me. Things for my friends and for my children. I started out using scrapbook paper and an exact-o knife, and graduated to handmade papers, archival quality glue and a craft knife with a very delicate, razor sharp tip. I now have punches, razor guides, fingertip blades and all sorts of neat little bits and pieces for paper cutting, but I rarely use them. I prefer to do it the old fashioned way, with scherenscnitte scissors and a knife, and hand drawn patterns.

The Tree of Life is a very old, very strong symbol in Scottish culture. It represents heaven and earth, the mortal plane and life itself. Originally depicted by knotwork, they now often resemble Rowan trees. It is a special, personal piece of myself that I really enjoy giving to other people, and a cutting I've done often for friends.

This is one of my first Tree of Life cuttings that I made, and this one was for my friend Amanda. She wasn't able to take it with her when she moved, and I never got it to her because the glass broke, as you can see, and I've just never gotten around to sending it to her. Sorry! I promise to get on it!

I've learned so much since this cutting, and I was itching to draw out a new pattern, so for Jennifer's housewarming, I decided to design a new tree of life, just for her. Now, I haven't done a cutting since I left Germany. One of the medicines I take gives me a terrible case of the shakes, so much so that I take an anti-parkinsons medication to control them. Recently though, I started a new med that has helped decrease the shakes even more, so I'm finally able to do work that requires fine-motor control again. Yay! This is the first piece I've done in two years, so please cut me a little slack when you see it.


 Don't you just love this paper? It's handmade, with real leaves (and dirt) pressed into it. I've been saving it for something special, because it's so beautiful that I just didn't want to cut into it.
 My first step was to cut a piece of the paper out that was sized to my pattern. I decided to give up about two inches around the edge in order to center my pattern on that gorgeous leaf. For the sake of full disclosure, this is not the piece I actually used. I decided to enlarge the pattern and so I had to cut another piece to fit the larger size. But of course, I neglected to take a picture.

 Here's my pattern. It's symmetrical, so I folded the paper in half and lined my pattern up with the edge, then taped it down. If your tape is going to touch a part of the paper that will not be cut away, touch your finger to the sticky side a few times to lessen the stickiness of the tape. You don't want it to ruin your piece when you pull it off later.
 Now I start cutting. Start with the details and leave the big pieces until last. Always pull, never push. And be very careful - one slip and you've severed a piece that connects the whole design. But if that happens, don't panic - you can apply a small piece of tape to the back of the cutting and trim off the excess tape with your knife. No one will ever know. Trust me, I've done it a thousand times, especially with delicate paper.
Always cut the piece away from the paper last. The big expanses of paper provide stability and give you a place to hold on to the piece while you cut.

And let me just say, this gorgeous paper was a dream to cut, except that it was very fibrous, and tufts of fibers pulled away from the paper every time I picked up my knife. It was very weird.


Carefully remove your pattern. If you have a very detailed portion with lots of loose ends, like the top of this tree with the leaves, your pattern might get tangled up, so go slowly. It's not a race. Well, sometimes it is, but usually not.


Ta da! But you're not done, not even close. Sorry to get your hopes up, I guess that was a premature ta da.

See those tufts of fibers in the corners there? It's time to clean those up. Use the tip of your knife to slice them away and give your piece nice, straight corners and unbroken lines. This takes just about as long as cutting the piece in the first place. It's a little ridiculous, but it's also the difference between a piece of art and a paper snowflake.


That's much better. But you can see that I accidentally tore one of the root pieces. I taped it from behind and like I said, no one would ever know except that I just told the whole world.

Unless you can find one of those really awesome clear glass plate frames, you'll need a background piece. I usually like to mount on hand painted watercolors, but with the variegations in the paper, I thought it would just be too much. Which is a shame, because I love painting with water colors so much. It's very therapeutic.
 This is the cutting on the background paper that I picked out. You can see that it's a little darker than the paper in the last picture - I just couldn't get behind that shade of brown. It looked a little cheap and gross to me. But then again, I am really picky about this sort of thing.

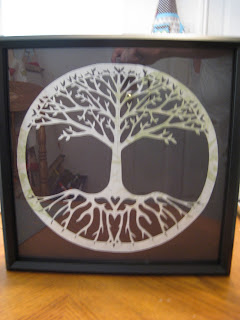
And here's the finished piece all framed up and ready to give to Jennifer and Talon! I think it turned out very well. See the little heart in the roots? And the way the tips of the branches and roots go negative in the border? I just love it. And so you don't think that this came purely from my brilliant imagination, I think I looked at a dozen pages of Tree of Life images and this design is an amalgamation of every one that I saw and liked.

I'll try to post pictures of a few other pieces that I drew out and cut later - there are a few framed around my house and many, many more in my paper cutting craft tote and tucked into my cutting mats. I hope that you like them, and that this encourages you to try it for yourself.

PS - Just so you don't think this is some amazing feat of craftiness that you could never do yourself, you should know that I researched, drew and cut this while watching Mission Impossible: Ghost Protocol with Husband last night. I'm just saying. If I can, you can.

Thursday, April 19, 2012

Recipe: French Toast Casserole

I don't care much for breakfast foods. Offer me cereal, oatmeal, scrambled eggs or bacon and I'll pass, thanks. I am just not a fan. But I love french toast. Oh. My. Goodness. The best french toast I ever had was in Belgium, and it was called something else, something... Belgian. It was amazing. Brioche dredged in eggs and cream, cooked in butter and topped with cinnamon and powdered sugar and fresh whipped cream - that is probably my favorite breakfast, ever. It didn't even need syrup. No syrup!

The downside to french toast is the preparation. You have to make enough egg mix to dredge all of your toast and you always run out halfway through, and then you have to figure out how to cook it so that it doesn't get super browned and taste like burnt eggs, and then you have to keep it warm without letting it get soggy - it's just such a pain. So when another military wife made this dish at a potluck years ago, I was in love. With the dish, not her. She was nice and everything, but I'm all set in that department.

Several ladies from the baby shower this morning asked me for this recipe, so I'm just posting it here to save us all some time and paper. Here we go:

 With a sharp knife, cube one loaf of good bread. By 'good bread' I mean that it shouldn't say Butterkrust on it. Spring for the nice stuff. I like to use bread that has nuts and seeds in it, french loaves, potato bread and country white bread for this, but it's totally up to you. Be careful not to smush your bread when you cube it.
 Dump all of your bread cubes into a greased 9x13" casserole dish.
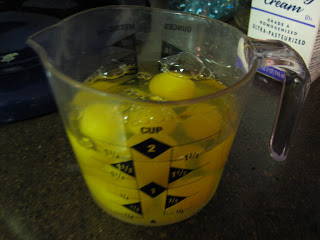
 In a stand mixer (or mixing bowl, if you use a hand mixer) cream 8oz of cream cheese
 8 whole eggs
 1 1/2 cups of milk
 2/3 cup of cream
 and 1/2 cup of syrup. Use the cheap syrup for this part - no sense in wasting good maple syrup in a casserole. Save that to drizzle on top later.
 Oh, and don't forget a splash of vanilla. A few teaspoons should do you.
 Pour this slightly soupy mixture over the bread cubes in your baking dish. I know it's a little chunky - that's okay. If you have more patience than me and add your eggs to the cream cheese one at a time, waiting until each is fully incorporated before you add the next, the result will be much smoother. I, however, lack the ability to stand still that long and pouring eggs out of a mixing cup fascinates me, so my mixture will forever be chunky. And I'm okay with that.
Gently fold the bread cubes over themselves (if you know how to fold, this will make sense) to give each layer a chance to absorb as much of the liquid at the bottom as possible. I say to do this gently because if you just stir it, you're going to wind up with a big dish of mush. It'll probably still taste good, but really, who wants to eat that?

Now stick the whole thing in your fridge until tomorrow. Seriously. It needs an overnight soak. I don't know what it is about night time, but I swear, if you make it in the evening and let it sit overnight, it will be awesome in the morning; but if you make it in the morning and let it sit until night time, even if it's the same number of hours, it won't turn out right. That's just how it is, and it's better if you go ahead an accept that this will never be a last-minute meal.

Pretend that it's tomorrow now. Take the casserole out of your fridge and put it directly into a 350'F oven. Some folks say to let it come to room temperature first, but with all the eggs in this dish, that makes me nervous. I know we're going to cook it, but still. Bake your casserole for about an hour. When it's done, remove it from the oven and melt 1/2 stick of butter, 1/2 cup of syrup and 1 tablespoon of cinnamon in a dish, give it a good stir and pour it on top of the casserole.

Ta da!

Serve this with extra syrup, some powdered sugar and fresh whipped cream - mmmm. Enjoy!