Let's just start this off with complete honesty, okay? I was not trying to make butter tonight. I was trying to make whipped cream. I have this baby shower tomorrow for my friend Jenn, and I made a lovely french toast casserole. I thought, what would be better on french toast than whipped cream? And because I'm me, I couldn't just go out and buy a tub of cool whip, no - I had to make it fresh. I have made whipped cream, clotted cream and pouring cream about a thousand times - I like to think that I know what I'm doing. Except that I don't, apparently.
Now this is a how-to rather than a recipe because, well, there aren't any measurements or real ingredients. It's not a hard and fast science. You're just taking one substance and altering it until it becomes something else. Two somethings, actually. Also, this is not how I wanted to do this how-to. I was going to take you step by step from heavy cream to pouring cream to whipped cream to clotted cream to butter. But that didn't happen.
Here's how I started out:
Trust me, you want a stand mixer for this. You can do it with a hand mixer if you have great dollops of patience and upper body strength, but a stand mixer makes life so much easier. You'll also need room-temperature heavy whipping cream. It doesn't have to be room temp, but this whole process will go much faster, as I discovered tonight, the warmer your cream is. Just don't heat it - we're not making creme fraiche.
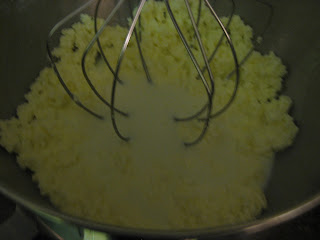
Two minutes in to whipping the cream in my mixer and this is what it looked like. Nice, huh? So close to whipped cream consistency. So close, and yet so far. I turned the mixer back on and started hunting for a pretty container to put my whipped cream in for the party tomorrow morning.
Two minutes later, I checked the cream again. Oh no! What has happened?!? I'll tell you what. The fat molecules in the cream have bonded, creating little fat globules that have separated from the dairy liquid in the cream. What you're looking at here is the earliest stage of butter. I somehow managed to completely skip pouring cream, whipped cream and clotted cream and go straight to butter. And once you reach this point, there's no turning back. You might as well just forge ahead and finish it off.
See that liquid? That's buttermilk. Buttermilk, of course, is a byproduct of butter making. Convenient, eh? Go ahead and pour that off into a tightly sealed container and use it to make pancakes. Or biscuits. Mmmm. AND THEN when you're done, use your homemade butter on them! Genius!
Once you've poured off the buttermilk, leave the butter globs in the mixing bowl and run some cold water in. Doesn't really matter how much. You're just going to rinse the butter.
Now comes the cool part. Gently gather all of the globs into one big ball of butter and lift it out of the water. Don't worry, it won't melt in your hands or anything. Start squeezing the ball, very very gently. See that white liquid running out of the butter? That's more buttermilk. The more liquid you squeeze out of the butter, the firmer it will be and the longer it will last. It never lasts very long in my house anyway, so I don't stress about this part. But really you should keep squeezing until almost no liquid comes out anymore. Because I'm serving this tomorrow morning and don't plan on bringing any of it back home, I only squeezed it for a few minutes. I also want it to be super spreadable, since we'll be eating it on quickbreads, I think. I'm sure there will be something at this party that we can put butter on, anyway. I don't particularly care what. I'll make people eat it with a spoon - I don't care. I still can't believe I screwed up whipped cream. Whipped cream! All you do is whip. cream.
Add your giant butterball back into the mixing bowl and stick it back on the mixer. This is the part where you add any flavorings - I've used honey, salt, garlic, herbs, cinnamon - really, the possibilities are limited only by your imagination. This is about how much salt I use for 1.5 cups of butter. Beat the butter on high for a few more minutes. If any more buttermilk separates, just pour it off - but if you added flavorings already, don't pour this buttermilk in with the stuff from earlier, or you'll taint it. And no one wants garlic flavored buttermilk.
At this point, you can either spread your soft butter into a glass or ceramic dish - NO PLASTIC - with a lid and refrigerate it, or you can pack your firm butter into a butter mold. I've never molded my butter before, despite having at least one mold hanging around here somewhere...I wonder where I put that thing? I haven't seen it since Germany...
Because I strongly believe in both 'waste not, want not' and taste testing, I smeared my spatula over a slice of toasty bread. For whipped cream, this butter sure does taste good! I just hope that the ladies tomorrow like it. And also that they don't think I'm crazy for bringing butter to a baby shower.


No comments:
Post a Comment